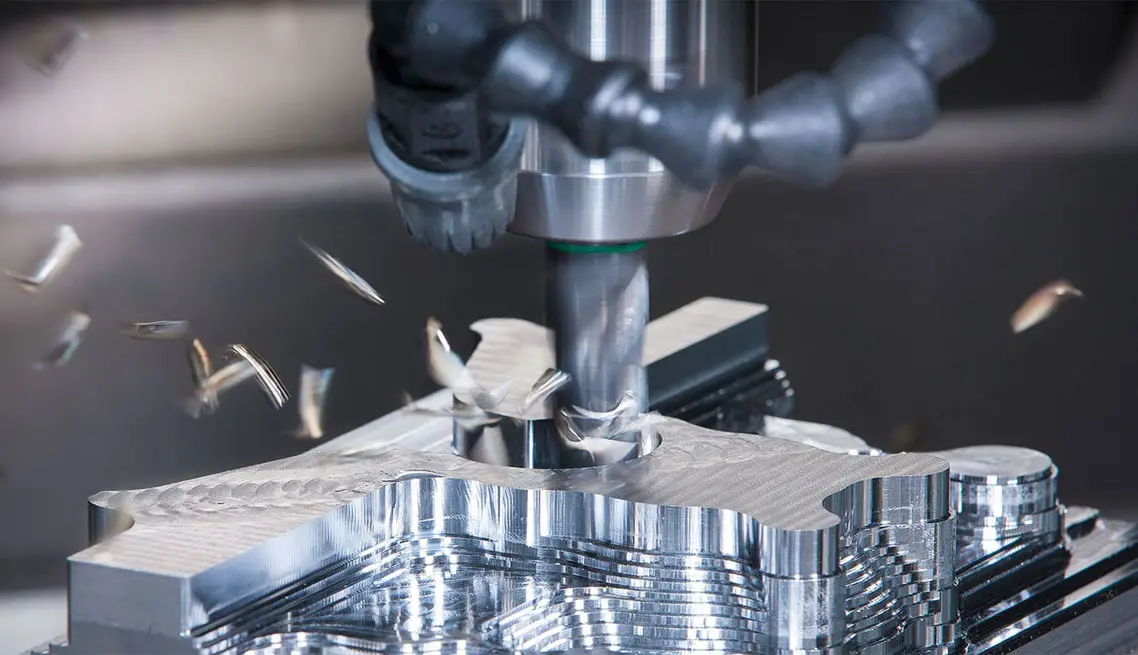
In the world of precision manufacturing, the line between a concept that works and a part that works is often drawn long before the CNC machine ever starts its spindle. For engineers and procurement specialists in Mississauga and across the GTA, the pressure to deliver complex, high-performance aluminum components quickly and cost-effectively is immense. The secret to navigating this pressure successfully lies not just in advanced machinery, but in a philosophy known as Design for Manufacturing (DFM).
At Gegal Machine Tools, with over 32 years of experience in the industry, we’ve seen countless projects where a design that looked perfect on a screen became a nightmare on the shop floor. Conversely, we’ve seen how a collaborative approach to design can streamline production, slash costs, and result in a superior product. This article serves as your comprehensive guide to optimizing your aluminum parts for CNC machining, ensuring your next project in Mississauga is a blueprint for success.
What is Design for Manufacturing (DFM)?
Design for Manufacturing is the engineering practice of designing parts with the manufacturing process in mind. It’s about anticipating the capabilities and constraints of CNC machining before the design is finalized . A part designed with DFM principles is easier to produce, requires less setup time, uses tools more efficiently, and is less likely to be scrapped due to machining errors. The goal is simple: achieve the required functionality with the lowest possible manufacturing cost and lead time, without compromising quality.
1. The Golden Rules of Geometry
The geometry of your part has the most significant impact on its machinability. By following a few foundational rules, you can ensure your design is inherently production-friendly.
The Curse of Sharp Internal Corners
One of the most common and costly mistakes in CNC design is specifying sharp internal corners. CNC machines use cylindrical cutting tools (end mills). When a rotating cylindrical tool moves into a corner, it cannot create a perfect 90-degree internal angle. Instead, it will leave a radius equal to the radius of the tool.
Specifying a sharp corner means a machinist must use a very small tool to cut as much material as possible, and then potentially use a process called Electrical Discharge Machining (EDM) to finish the corner. This is extremely time-consuming and expensive. A better approach is to design all internal vertical corners with a radius. Ideally, this radius should be slightly larger than the standard tool radius your machinist would use . A simple rule of thumb is to design for a radius of 0.8mm (1/32″) or greater. This allows for efficient material removal with a robust tool, saving time and money.
The Depth-to-Diameter Ratio
When designing cavities, pockets, or deep features, you must consider the limitations of tool length. Tools that are long and thin are prone to deflection, chatter, and breakage. As a general guideline, the depth of a cavity should not exceed four times the diameter of the tool used to create it . For example, if you have a pocket that requires a 10mm tool to navigate its features, the depth of that pocket should ideally not exceed 40mm. Exceeding this ratio is possible, but it requires specialized tooling, slower machining speeds, and multiple passes, all of which drive up cost and cycle time.
2. Mastering Thin Walls and Fine Features
Aluminum is a forgiving material, but it has its limits. Designing features that are too thin or too tall can lead to vibration during machining, resulting in poor surface finish and parts that are out of tolerance.
Wall Thickness
Thin walls are susceptible to vibration (“chatter”) from the cutting tool. This can ruin surface finish and even distort the part. For aluminum, a minimum wall thickness of 0.8mm is a good starting point for smaller features . However, for larger or taller walls, this minimum must increase. A wall that is 25mm tall will need to be significantly thicker than one that is 5mm tall to resist the pressure of the cutting tool.
The Aspect Ratio Constraint
This is a critical concept for features like ribs, bosses, or cooling fins. The aspect ratio is the height of the feature divided by its width. For aluminum, a general rule is to keep the aspect ratio at or below 6:1 . This means a 1.0mm thick fin should not be taller than 6mm. As the aspect ratio increases, so does the risk of tool deflection and part vibration. For high-aspect-ratio features, you may need to consider design alternatives or specialized machining strategies that can increase production time.
3. The Hole Truth: Designing for Drilling and Tapping
Holes are among the most common features on machined parts, yet they are often a source of unnecessary complexity. When designing holes, think about the tools that will create them.
Standard Sizes are Your Friend
Whenever possible, use standard drill sizes. Drills are manufactured in precise increments (metric and imperial). Designing a hole with a non-standard diameter, like 5.23mm, will require a custom drill or an additional finishing operation like boring or reaming. Sticking to standard sizes, such as those for tapping (M3, M4, M6, etc.) or clearance (3.0mm, 4.0mm, etc.), allows the machinist to use a standard, off-the-shelf tool, which is faster and cheaper.
Through Holes vs. Blind Holes
When possible, design holes to go all the way through the part (“through holes”). Drilling a through hole is simpler than drilling a blind hole, which has a defined depth. Blind holes require more precise control over the machine and create a challenge for chip evacuation at the bottom of the hole. If a blind hole is necessary, ensure the depth is not excessive and that there is enough room at the bottom for the drill point.
Tapping Considerations
For threaded holes, a few DFM considerations can make a big difference. First, avoid specifying a thread that runs all the way to the bottom of a blind hole. Leave a small amount of space, or “lead-in,” at the bottom for the tap. Second, ensure there is enough material around the threads to provide the necessary strength without creating a massive, heavy boss.
4. The Foundation of Quality: Material Selection
The grade of aluminum you choose is a fundamental design decision. Different alloys offer different balances of strength, corrosion resistance, and machinability. For most CNC applications, 6061 aluminum is the workhorse. It offers excellent machinability, good strength, and great corrosion resistance, making it suitable for a vast range of parts from automotive components to consumer goods . For applications requiring higher strength, such as in aerospace, 7075 aluminum is a superior choice, though it can be slightly more challenging to machine than 6061 . Consulting with your machining partner, like Gegal Machine Tools, early in the design phase can help you select the perfect material for your part’s function and budget.
5. Surface Finish: Specify with Purpose
Surface finishes are essential for both aesthetics and function, but over-specifying them can add significant cost. The “as-machined” surface from a CNC machine is often perfectly acceptable for many internal or structural parts. It may have visible tool marks but is dimensionally accurate.
If you need a finer finish, consider specifying it only on critical surfaces. For example, a sealing surface might require a fine finish, while the rest of the part can be left as-machined. For cosmetic improvement and corrosion resistance, anodizing is an excellent option for aluminum. Type II anodizing is a standard, versatile finish that can add color and protection. However, remember that anodizing adds a very thin layer to the surface, so dimensions on critical features may need to be adjusted to account for this build-up .
6. Simplify and Consolidate
One of the most powerful DFM strategies is to look at your assembly and ask: “Can this be one part instead of many?” Combining multiple components into a single machined part eliminates assembly labor, reduces the number of fasteners, and can increase the overall strength and precision of the final product . While the individual part may cost more to machine, the overall system cost often drops significantly.
The Gegal Advantage: Bringing DFM to Mississauga
Design for Manufacturing is not just a checklist; it’s a collaborative process. At Gegal Machine Tools, our team of experienced engineers is dedicated to working with you to refine your designs for optimal manufacturability. With our manufacturing facility right here in Mississauga, we offer a distinct advantage. We can provide rapid feedback, suggest cost-saving design alterations, and ensure that your part is optimized for production on our advanced CNC equipment. We bridge the gap between your vision and a physical, high-quality component.
By embracing these DFM principles, you can avoid common pitfalls, reduce lead times, and control costs. Whether you are prototyping a new medical device or launching a production run for the automotive sector, a well-designed part is your first and most important step toward manufacturing excellence. Contact Gegal Machine Tools today to discuss how we can bring your optimized designs to life.